Powered by Blogger.

The Hippie Moose

Simple, Spiritual, and Sustainable Living.

I'm sure you've seen this floating around facebook.  I decided to try after my 28 day Clean Gut cleanse as a way of eating oatmeal again without the gluten.

Overnight Oatmeal
1 cup almond or coconut milk
1/2 cup whole oats (large flake)
1/4 tsp. vanilla
1/4 tsp. cinnamon
1 tbsp. raisins
2 tbsp chia seeds
1 tbsp ground flax seed

Mix everything in a mason jar. Screw on lid and place in fridge overnight.

By morning the chia seeds have softened and all the milk has been absorbed. I really love it. My husband prefers dried cranberries.  I like mine cold but I have a co-worker who warms her's up and loves it.

Are oats gluten free?  Well it actually depends on the company you buy them from.  Quaker says that can't help some cross contamination and testing shows gluten in their product. What companies are gluten free?  Here are a few:
Bob's Red Mill 
Cream Hill Estates
Only Oats 

Check your local bulk food or health food store!

I JUST found this recipe at theyummylife.com ~ Pineapple Coconut Oatmeal.  I will be trying that out! (Click on the picture below for the recipe)  For a link to a bunch more varieties of overnight oatmeal check out The Yummy Life website HERE.
April 10, 2014 No comments
Every year I try to make some things to give away at Christmas.  2013 I opted for Homemade Caramels, Peanut Brittle, and Cinnamon caramel sauce.

I have had a number of people ask for the recipe for the caramels so here ya go...

Homemade Kahlua Caramel

Homemade Caramel

1 cup butter, unsalted
1 cup light corn syrup
1 14-oz. can sweetened condensed milk (or substitute two cups half and half or light cream BUT factor in a longer cooking time)
2 1/4 cup brown sugar
1 tsp. vanilla
*1/4 cup Kahlua ~ optional


1. Line 8x8 pan with parchment paper, even up the sides.
2. Cut butter into smaller, even sized cubes for even melting. Melt over low in sauce pan.
3. Carefully add sugar by pouring it into the center of the pan. Stir slowly until well combined with melted butter.
4. Mix in corn syrup and sweetened condensed milk (or cream).
5. Cook and stir on medium for one minute, then to med.-high until boiling. You want to change temperatures slowly. Once boiling, insert candy thermometer
6. Reduce heat to about medium, adjusting so that you keep a moderate, steady boil. Stir frequently!
7. Watch thermometer closely!!
8. When thermometer reaches 244°, remove caramel from heat (this is low firm ball stage; reaching this stage from boiling takes about 30 minutes with sweetened condensed milk ~ longer with cream)
9. Stir in vanilla or Kahlua. Pour the caramel into the prepared pan.
10. Allow to cool for several hours. I let it cool to room temp. and then put it in the fridge.  Once it's well set I pop the parchment paper out of the pan and cut it with a pizza cutter.  Allow lots of time to wrap them... it's a pain in the butt.

** The picture above I doubled the recipe to make more at once.


January 03, 2014 No comments
Christmas Peanut Brittle is all done....


Peanut Brittle

1 cup white sugar
1/2 cup light corn syrup
1/4 tsp. salt
1/4 cup water
1 cup peanuts
2 tbsp. butter softened
1 tsp. baking soda

1.  Line a  large cookie sheet with parchment paper.
2. In a heavy pot combine sugar, syrup, salt and water. Stir until all sugar is dissolved and bring to a boil. Stir in peanuts and place candy thermometer in pot (not touching the bottom of the pan). Stir frequently until it reaches 300 degrees F. (150 degrees C.)
3. Remove from heat and add butter and baking soda. Stir until butter is fully melted and soda is incorporated.  Pour onto cookie sheet.  If necessary use a spoon to space out peanuts.  Cool completely.  Break into pieces and store in a sealed container or bag for gift giving!!
December 16, 2013 No comments
Today was Chili Sauce day. It's not a favorite day for my family but it's one of those necessary days every year.  Tomorrow is Chili Sauce Day Take 2.  Also not popular.

This morning I dragged my faithful family to the farm down the road to pick roma tomatoes.  We picked 1 bushel... well three of us did, the other one wandered around looking for bugs and avoiding any manual labour.

Said bug hunter redeemed himself by spending an hour chopping onions, peppers, and helping me skin what seemed like a million little red lava bombs.

All for this....

Here's how to make your own!

Steph's Chili Sauce (adapted from Cindy's!)
6 onions chopped
1/2 bushel tomatoes
3 green peppers chopped
3 red peppers chopped
4 cups vinegar
2 cups white sugar
2 cups brown sugar
8 gloves garlic, smashed
1/4 cup pickling spice

I always blanch my tomatoes and remove the skin.  Then I dump it all into a huge stock pot, bring it to a boil, reduce and simmer until you have about 1/2 left. (a few hours).  Can it in jars.  We eat it all winter with nacho chips, or sometimes it's my base for pasta!  Love it!!


September 19, 2013 2 comments
It's that time of year again... the time where I look at the mountain of zucchini on my table and wonder... "Why do I do this to myself every year??"


Oh well. Time to suck it up and deal with it.  If you are in the same predicament here are a few ways I'm using them up this year...

1. Zucchini Bread ~ the ol' stand by!
 I do some with chocolate chips and some without.

3 cups all purpose flour
1 tsp. salt
1 tsp. baking soda
1 tsp. baking powder
3 tsp. cinnamon
1/4 tsp. nutmeg
1/2 tsp. ginger
3 eggs
1 cup vegetable oil
2 cups white sugar
3 tsp. vanilla extract
2 cups grated zucchini
1 cup walnuts (optional) OR
1 cup chocolate chips (optional)

Grease and flour two 8x4 inch loaf pans.  Preheat oven to 325 degrees.
Mix flour, salt, baking powder, baking soda, cinnamon, nutmeg, and ginger.
Beat eggs, oil vanilla, and sugar together in a large bowl.  Add flour mixture to creamed mixture and mix well. Stir in zucchini, nuts, and chocolate (whichever you plan to use). Pour batter into pans. Bake 45-60 min or until a tester comes out clean from the center of the loaf. Cool in pans on rack for 20 min. Remove from pan and cool.  (For the record... the loaf on the left I tried to get out of the pan while it was WAY too hot still... cooling it is actually important.)

I usually double the recipe to do 4 loaves and give some away.


2. Zucchini Stuffing with Cheddar ~

4 slices of bread cubed
1/4 cup melted butter
2 cups cubed zucchini
1 large onion, chopped
1/2 cup corn (I use frozen)
2 cloves garlic, minced
2 eggs beaten
salt and pepper
1/4 cup milk
2 cups shredded Cheddar

Toss the bread in a greased 9x13 dish, toss with the melted butter. Add the zucchini, onion, garlic and corn. Toss lightly. Mix the eggs, salt, pepper, and milk together and pour over the bread mixture.  Top with the cheese.  Bake covered at 350 for 30 min. Uncover for 10 more min.

It's pretty much like a stuffing with zucchini... I loved it.


Some other ideas that look AMAZING...

http://www.closetcooking.com/2013/07/25-zucchini-recipes.html


September 17, 2013 1 comments

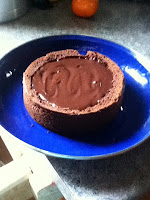
This is one of my more popular creations.  Here is a short How To on how to make this cake!  Enjoy.

Bake 2 chocolate cake layers.

I like this one:  

2 cups white sugar
1 3/4 cups all-purpose flour
3/4 cup unsweetened cocoa powder
1 1/2 teaspoons baking powder
1 1/2 teaspoons baking soda
1 teaspoon salt
2 eggs
1 cup milk
1/2 cup vegetable oil
2 teaspoons vanilla extract
1 cup boiling water
DIRECTIONS:
1.Preheat oven to 350 degrees F (175 degrees C). Grease and flour two nine inch round pans.
2.In a large bowl, stir together the sugar, flour, cocoa, baking powder, baking soda and salt. Add the eggs, milk, oil and vanilla, mix for 2 minutes on medium speed of mixer. Stir in the boiling water last. Batter will be thin. Pour evenly into the prepared pans.
3.Bake 30 to 35 minutes in the preheated oven, until the cake tests done with a toothpick. Cool in the pans for 10 minutes, then remove to a wire rack to cool completely.


Make a hot fudge sauce.

1 cup (250 mL) semi-sweet chocolate chips
1 can (300 mL) Regular or Low Fat Eagle Brand sweetened condensed milk
2 tbsp (30 mL) butter or margarine
2 tbsp (30 mL) water
1 tsp (5 mL) vanilla

Preparation:

1.  Melt chocolate chips with Eagle Brand, butter and water.
2.  Beat smooth with wire whisk if necessary.
3.  Remove from heat and stir in vanilla.

MAKE ICING:
Cream Cheese Icing
1 pkg (8oz) Cream Cheese
1 cup butter
1 tsp Vanilla
1 (16 oz) bag icing sugar (approx. 4 cups)

Bring cheese and butter to room temp.  Beat together until smooth with vanilla.  Beat in sugar a cup at a time until creamy.


Hollow out the bottom layer of the cake.  (Approx. 1/2 inch deep.) 

Cool the fudge sauce down to make it easier to handle.
Fill the well in the cake with fudge sauce.  Chill
Top with cream cheese icing.*
Top with second layer of cake.
Ice entire cake with cream cheese icing.
DONE!
DECADENT!
(Sorry the pictures are so bad.  Broke my camera lens and am using my ipod.) 


June 17, 2013 2 comments
Had some garlic to use up...

 Wrapped it in some foil with a drizzle of olive oil.  Baked for about an hour at 350 degrees.


Mash it up and add it to a jar of mayo...


Mmmmmm, Garlic Mayo!
April 26, 2013 2 comments
Just before Christmas I came across this recipe for Chocolate Peanut Butter Squares on Pinterest.  They are awesome!  SO Easy! I must have made them at least 10 times over November and December.  All they require is a microwave and a pan!


Source: letsdishrecipes.com via Stephanie on Pinterest
January 14, 2013 2 comments


Yes, I am a vegetarian.  That doesn't mean I don't live with a bunch of carnivores.  I thought I would share my popular pulled BBQ beef recipe.  My family loves this and I like how versatile it is.  The first night I serve it on homemade buns, later I can make a shepherds pie with it, add it to pasta sauce, serve it over rice... etc. etc. You see what I mean.

Steph's Pulled BBQ Beef

1 cup sliced onions
1 cup chicken broth
1/2 cup red wine vinegar
1/2 cup brown sugar
1/4 cup tomato paste
2 tbsp. soy sauce
2 tbsp. prepared mustard
4 cloves of garlic, minced (or 1 tsp. powdered)
1/2 tsp salt
3 lb roast

Whisk together the first 9 ingredients.  Place the roast in your slow cooker (I trim off excess fat first).  Pour the sauce over the roast, roll to coat all sides.
Cook on Low for 8-10 hours or on High for 4-5 hours.
Transfer roast to a large plate/platter.  Cover to keep warm.  Skim any fat off the top of the sauce.  Place sauce in large frying pan. Bring liquid to a boil on med-high heat. Boil gently for 15 min. 
Shred the beef with two forks, add to the sauce.  Stir and serve.

I usually dump the whole thing back in the slow cooker to stay warm until I'm ready to serve.
This recipe is pretty forgiving, I have substituted ketchup for the tomato paste, apple juice for the broth, maple syrup for the brown sugar,
September 28, 2012 No comments


No Frills had their onions on sale recently.  The 10 lb bags were $1.49.  I bought 2 bags.  What can I say, I'm a sucker for a good sale and I like to buy things while they are in season.

The problem then presented itself... what I'm I going to do with all these blessed things!

I chopped them.  All of them.  Then I backed them in bags and froze them all.  This was not my first choice but I don't have a pressure cooker so I couldn't can them.

In case you are the proud owner of a pressure cooker, and you have onions abounding in your garden/market here is the recipe I really WANTED to do...

http://canninggranny.blogspot.ca/2011/05/canning-caramelized-onions.html

Caramelized onions are my favorite!!  Maybe I will ask for a pressure cooker for Christmas.

I think my husband is happy that's all over.... I guess the fumes were getting to everybody!

September 20, 2012 1 comments
I have been meaning to make ketchup for quite some time.  I ran out the other day and since necessity is the mother of invention, I was gave it a shot.

I got my recipe here: http://www.instructables.com/id/Ketchup-Catsup-Recipe/

I didn't have any allspice but other than that I followed the recipe (my agave nectar wasn't blue, it was Light Madhava).  I really liked it and more importantly I put it in an old ketchup bottle, threw it in the fridge, and the kids didn't notice a difference.  Bonus.

I like the fact there is no corn syrup in it, I can pronounce all the ingredients, and I can control how much sugar/salt it contains!

September 18, 2012 1 comments


We just got home from our annual week of camping with a huge group of GREAT friends.  I just wanted to share this years “HIT” snack with the 11 kids present!  So simple and easy but so yummy.

You will need one flour tortilla per person, chocolate chips, marshmallows, and peanut butter.  Spread peanut butter over the whole tortilla, on half sprinkle chocolate chips and marshmallows (if you have large marshmallows cut them in half).  Fold the top side over and place in a hot frying pan.  I used a cast iron skillet so I didn’t need to grease the pan at all, I just heated them to golden brown on each side.  They don’t take long to do and if your pan is large enough you can do two at a time no problem!

I found this version that includes bananas with also look good…. the problem with bananas while camping is that they make you very attractive to mosquitos.

imagesCAK77ZAT

http://www.hersheys.com/recipes/recipe-details.aspx?id=6572&name=Chocolate-Quesadillas#

August 11, 2012 1 comments
Easy Black Bean Burgers
15 oz. can black beans, rinsed and drained
2 tbsp. ketchup
1 tbsp. yellow mustard
1 tsp. onion powder
1 tsp. garlic powder
1/3 cup instant oats

Mash the beans up to a paste, add ketchup, mustard and spices.  Stir in oats.
Make 4 patties.

Option 1:
Bake in a 400 degree oven on parchment paper.  7 min. per side.

Option 2:
Fry in a non-stick pan on both sides until browned.

August 10, 2012 1 comments
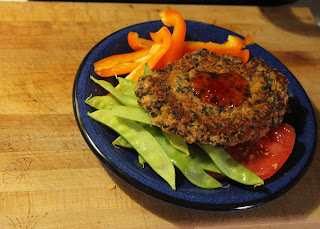
welcome to my brain . net: Black Bean Burger Tacos


OK So you have to give these a try!  I was reading Welcome to my Brain and when I saw how easy these were I had to see if they could possibly be good.


So far I'm a little sceptical.


SO YUMMY!
Even my 10 year old son liked them!!
You have to check out the link and give them a try!

For the record I added some fresh garlic and I ate it with some hot red pepper jelly on top. I'm drooling just remembering it. I also had some organic instant oatmeal kicking around that nobody would eat so as a bonus I found a use for that too! Finally, I did NOT use my oven.  Anyone who lives in Ontario knows why... it's called a heat wave and I was not going to rev up the heat box for dinner. I fried mine in a cast-iron pan and they turned out perfect.


July 25, 2012 No comments
This is my current favorite soup.  I like that my kids can make it for me with a bit of instruction and I can do as little as necessary.

Potato Leek Soup

1 Leek
2 Onions
bit o' butter

1 box Vegetable Broth

Salt & Pepper
1/2 tsp Thyme

1 cup buttermilk  (make this using one cup milk with 1 tbsp. white vinegar.)
Instant mashed potatoes or dehydrated potato flakes.

Slice the leeks and onions, saute in a pan with butter till soft.  Pour in your vegetable broth, some salt and pepper, and the thyme. Shove in that buttermilk too. Enter the stick blender if you have one, whhizzz until everything is creamed.  If you don't have one, no worries, you have a chunky soup. 
Now add a few sprinkles of the potatoes.  Keep adding until it's a consistency you like.... if you go overboard add a bit of milk or water. 

Yummo, soup in 15 min.

Now in case you think I'm the only one cheating like this... check this out...
http://www.goodhousekeeping.com/recipefinder/potato-leek-soup
January 24, 2012 No comments
Well I decided I better post something from the recipe book I felt so guilty about buying…(see here)  just to prove I actually use it! 
This was amazing!  It's a side dish but I could have had just this and been supremely happy.
100_2683
Whipped Sweet Potatoes with Maple Pecan Topping

6 sweet potatoes, peeled and cubed (approx. 3 lbs.)
2 russet potatoes, peeled and cubed (approx. 1 lb.)
3 eggs
2 tbsp. maple syrup
2 tsp lemon juice
3/4 tsp. salt
Pinch nutmeg
Pinch pepper
1 1/4 cups chopped pecans
1/3 cup packed brown sugar
1/2 cup butter, melted

In a large saucepan of boiling salted water, cook potatoes and sweet potatoes, covered, until tender, about 12 min.  Drain; return to pot.  Mash until smooth.

Beat together eggs, maple syrup, lemon juice, salt, nutmeg, and pepper;  beat into potatoes.  Scrape into greased 9 x 13 inch glass baking dish.   ( To prepare ahead of time, cover and refrigerate for up to 24 hours; add 10 min to baking time.)

Stir pecans with brown sugar; sprinkle over potatoes.  Drizzle with butter.  Bake at 350 degrees F until set and bubbly, about 45 min.
April 08, 2011 3 comments


 I love doing baby shower cakes.  They are always fun to do!

Baby shower cake ~ boy


After the baby shower came my youngest sons birthday.  He wanted a Star Wars cake.  Again.  I had a million other ideas for cakes but... no.... he wanted star wars.... again.  So here is, hopefully, my last Star Wars cake.

R2D2 Cake

February 22, 2011 No comments
IMG_0018
So ya have some leftover dough from your buns (see HERE) and you want to eat something yummy. Well prepare yourself for something great….
Roll out your dough into a 1/4 inch thick rectangle.
Brush with melted butter and sprinkle with garlic powder, and any herbs you like.  (I used basil and oregano).
Now shred cheese on one half of the rectangle.
(I also added a drizzle of my favourite sweet BBQ sauce.)
Fold your dough over to seal everything in.  Roll with your rolling pin just to flatten out slightly.
Let rise for 30 min.
Bake at 400 degrees for 15 min.
Cut into strips.
IMG_0011
An AMAZING dip for these is a roasted red pepper and sun dried tomato puree….
This actually came from a Vegetarian Times recipe for pita pizza.  This was the sauce they used instead of a tomato pizza sauce:

1 cup jarred roasted red peppers, rinsed and drained.
6 oil packed sun-dried tomatoes, drained, plus 1 tbsp. oil.
1 clove garlic, pressed or chopped super fine. (I used 2)
(I also found it a bit acidic so I added a tbsp. of honey to cut the acid and add some sweet, taste it and see if you think it needs it for yourself)
Put everything into the food processor and spin the crap out of it.
NOW DIP!!  AAAHHHHH.
January 31, 2011 No comments
I found a recipe for fast burger buns and thought I would try them.  The process is a bit different from anything I had ever done before but I was really pleased with them and the great thing is they only require 40 min. of proofing/rising.

Here is the recipe:
4.5 cups flourIMG_0013 ( I used two cups all purpose & 2.5 cups whole wheat)
2 tbsp. yeast
1 cup milk
3/4 cup water
1 tsp. salt
1/2 cup oil (i used olive oil)
3 tbsp. honey.
In a bowl combine 2 cups of flour and the yeast.  Stir to mix the yeast through.
Heat the water, milk, honey, salt, and oil until warm but NOT hot. (I just microwaved the whole thing in a glass measuring cup for a minute on high).
Stir this into the flour until it’s all combined.  Add the rest of the flour gradually until you have a soft dough.  Knead until soft and smooth.  Cover the bowl with a towel and let the dough rest for 10 min.
Roll out the dough to 1/2 inch thick using a round cutter of some sort.  Place on a greased baking sheet (I used parchment paper instead) and let rise for 30 min.  Bake for 12-15 min. at 400 degrees.

This recipe should make about 2 dozen buns.  If you have no use for 2 dozen.... hold on and I'll show you what I did with the other half...... to be continued.
January 29, 2011 No comments
I bought a new cookbook.  I have quite a NUMBER of cookbooks.  Justifying the need for another one is not easy, but somehow I did it. To be fair ~ I took it out of the library originally and  by the time I wrote down all the page numbers of things I wanted to try/copy down I had half the book listed.  So here it is…
Canadian Living ~ The Vegetarian Collection.
January 26, 2011 No comments
Older Posts

About Me

The Hippie Moose
View my complete profile

Follow Us

The Hippie Moose

Labels

about us art art truck books cake Camping canning cooking crafts Creativity crochet December Photo Project decluttering diy dreadlocks family finances food gardening gluten free green cleaning Health homeschooling inspiration kids Kingston 4 paws knitting live life outside me music Native off-grid our property painting path to minimalism pets photography pictures Pirate Day Powwow PTDS quilting service dog sewing simple living stuff I LOVE sustainability tattoos thrifty stuff upcoming events vegetarian water

Blog Archive

  • ▼  2019 (1)
    • ▼  March (1)
      • No He's Not Blind, And Other Random Questions
  • ►  2017 (4)
    • ►  September (1)
    • ►  March (1)
    • ►  January (2)
  • ►  2016 (1)
    • ►  July (1)
  • ►  2015 (3)
    • ►  December (1)
    • ►  September (1)
    • ►  January (1)
  • ►  2014 (17)
    • ►  December (1)
    • ►  October (1)
    • ►  September (1)
    • ►  July (1)
    • ►  June (2)
    • ►  April (2)
    • ►  March (4)
    • ►  February (1)
    • ►  January (4)
  • ►  2013 (47)
    • ►  December (21)
    • ►  September (3)
    • ►  July (1)
    • ►  June (2)
    • ►  May (2)
    • ►  April (5)
    • ►  March (1)
    • ►  February (5)
    • ►  January (7)
  • ►  2012 (23)
    • ►  October (2)
    • ►  September (6)
    • ►  August (2)
    • ►  July (6)
    • ►  April (4)
    • ►  January (3)
  • ►  2011 (18)
    • ►  June (2)
    • ►  May (2)
    • ►  April (4)
    • ►  March (1)
    • ►  February (2)
    • ►  January (7)
  • ►  2010 (68)
    • ►  December (17)
    • ►  November (3)
    • ►  October (6)
    • ►  September (6)
    • ►  August (3)
    • ►  July (6)
    • ►  June (5)
    • ►  May (5)
    • ►  April (3)
    • ►  March (5)
    • ►  February (2)
    • ►  January (7)
  • ►  2009 (79)
    • ►  December (27)
    • ►  November (9)
    • ►  October (5)
    • ►  September (5)
    • ►  August (3)
    • ►  July (6)
    • ►  June (6)
    • ►  May (8)
    • ►  April (4)
    • ►  March (5)
    • ►  February (1)

Sitemeter

FOLLOW ME @INSTAGRAM

Created with by ThemeXpose | Distributed By Gooyaabi Templates